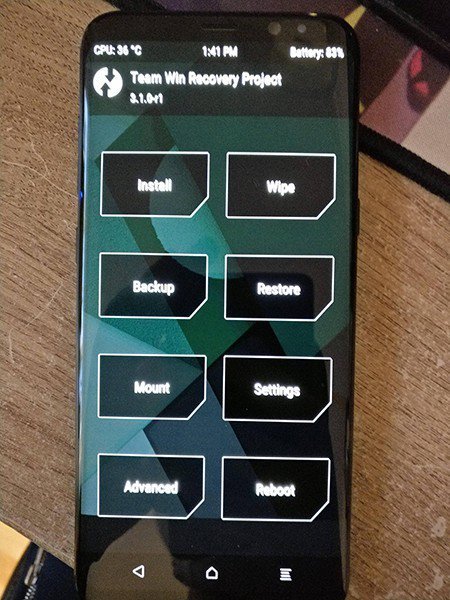
The stunning and top of the line Smartphone, just released, Galaxy S8, is now in the hands of geeks. And you know what we geeks do the first thing on our phone?. We unleash its true power by rooting it and installing custom recovery. Today I’m gonna show you the way to install TWRP Custom Recovery on Galaxy S8. The method is pretty simple. You just need to follow the instruction given below properly. Custom recovery like TWRP is necessary if you want to install third party roms or tweaks on your Galaxy S8.
Install TWRP Recovery on Galaxy S8 only requires a few things that are. A PC, a Galaxy S8 and few software programs. One thing to not that this version of TWRP recovery only works on Galaxy S8 with Exynos chipset. This doesn’t work on snapdragon chipset Galaxy S8. Now lets start the procedure for TWRP Recovery Galaxy S8 Custom recovery.

TWRP Custom Recovery for Galaxy S8
If some you don’t know what is a custom recovery then let me tell you. Every Android phone comes with with stock Android Recovery 3e. You can use it to factory reset or wipe cache of your phone forcefully. But custom recovery is much more powerful capable of doing more tasks. Like, flashing a zip file, custom roms, wiping caches etc.
This TWRP Custom recovery for Galaxy S8 works only on these models listed below,
Supported Galaxy S8 Models;
- SM-G920F
- SM-G920FD
- SM-G950N
- SM-G950L
You can check the model of your S8 by going to Settings>>About Phone>>Model No. If it matches the above specific models then you can go ahead and proceed.
Note:
Remember that installing a custom recovery on Galaxy S8 is an unofficial method. This will void your phone’s warranty. Proceed at your own risk. If anything wrong happens with your phone’s functionality then we won’t be held responsible, thanks.
Before Proceeding
Do these steps before flashing the recovery on Galaxy S8.
- Backup your important data.
- Install the Samsung USB Drivers on your PC.
- Go to Settings>>About Phone. Tap on Build No seven times repeatedly. This will enable developer options. Now go to Developer options and enable USB Debugging mode.
- With in the Developer options, also enable OEM Unlock.
- Charge you phone above 50%.
Download Required files
How to Install TWRP Custom Recovery on Galaxy S8 (Exynos Chipset)
Follow the steps below to flash Galaxy S8 Custom recovery.
Step-1
- Downkoad the Galaxy S8 TWRP recovery and odin.
- Extract the Odin file.
Step-2
Step-3
- Now turn off your phone. Enter into Download Mode by pressing and holding Volume Down+Bixby+Power button for a few seconds. A warning screen will appear, press the Volume UP button to confirm the task.
Step-4
- Launch the Odin flash tool that you have downloaded in the first step.
Step-5
- Connect your phone to the computer. Odin will detect your device and it will appear a blue highlighted ID:COM box. This means your device is connected successfully.
Step-6
- Now Click on AP/PDA option in Odin and select the TWRP Recovery which is in tar.md5 format.
- Make Sure Auto Reboot and F.Reset Time options are checked and all other are unchecked in Odin.
Step-7
- Review the whole process again for any errors.
Step-8
- After all is set click on the Start button to begin to begin flashing Custom TWRP recovery on Galaxy S8. The Odin will start flashing the recovery.
Step-9
- After some time a PASS message will appear on Odin when the process completes.
Step-10
- When the Pass message appears your device will automatically reboot. Disconnect the cable when you see the home screen.
If Stuck at Samsung Logo: If somehow your phone fails to show up homescreen and stucks at boot logo then follow these instructions to fix it.
And that is how you Install TWRP Custom Recovery on Galaxy S8. Hope you like it. Drop your comments below and subscribe to this blog for more Galaxy S8 things. Like us on Facebook and Twitter.

