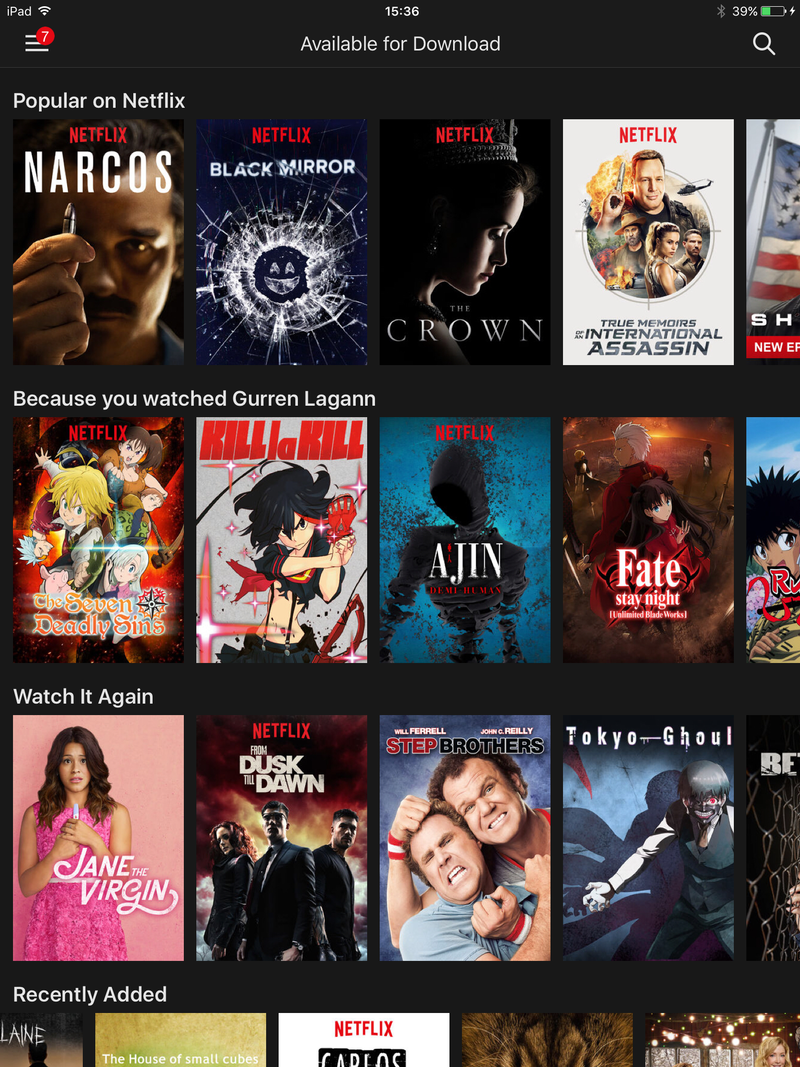
Here, we show you how, and offer a workaround for shows not yet available to download using Netflix’s new feature. If you’ve been dying to watch Netflix offline, here we have ways to let you do so. In this guide we’ll show you how to watch your favourite Netflix shows and films offline not only on your iPhone or iPad but also your Mac.

Step 1:
Netflix introduced offline viewing for iOS and Android users. This follows on nicely from Amazon’s lead after that company introduced a similar functionality back in 2015. If you want to download content to your Mac it’s a little tricky. We have found a way, though, and we’ll tell you how to do it.
Step 2:
Make sure you’ve got the latest version Netflix. Check the App Store for any available updates, and update it if so. Once you’ve updated the app and signed in, navigate to the “Available for Download” section to browse a huge selection of shows to download, including Netflix Originals like Narcos, The Crown or more.
Step 3:
Now, when you have the show you wanna watch select it and tap the download icon next to the episode you’re after. To browse them, navigate to the menu and tap My Downloads. Your offline content will be displayed in a list, and simply tap to play whatever you choose. If you want to download the episode in higher quality, head to the menu and tap App Settings > Downloads section > Video Quality.
Step 4:
Now there is one issue, not all the shows are officially available for download. But there are various ways you can download those Netflix TV shows using a Mac. One of them is recording your Mac’s screen.
Disclaimer: As this method isn’t normally allowed by Netflix, it violates the company’s terms and conditions, so please proceed at your own risk.
Screen Recording
A software which records screen. The program can record whatever you’re watching and then saves it. This might seem troublesome for some, but it’s the most efficient way we’ve found to download Netflix.
There are many screen recorders out there for Mac, such as ScreenFlow, Camtasia and others. We’ll here use Apowersoft Mac Screen Recorder, which can be downloaded. There is free version of Apowersoft as well as paid. The free version will record for three minutes whereas paid version which costs around £33 including VAT allowing you to record for an indefinite amount of time.
Step 5:

After downloading install Apowersoft and launch it. You’ll first want to check that it is set to record your system audio, rather than your microphone. Click on the ‘Audio Input’ icon to reveal a dropdown menu which will allow you to change the input.
You’ll want to select ‘System sound’. Once you’ve done this, you’ll notice that the program changes the default audio output to the software, rather than your speakers.
Step 6:
Next, we suggest removing the ‘Show recording boundary’, ‘Show recording toolbar’ and ‘Record mouse cursor’ options to get a cleaner output video.
Step 7:
Download an alternative browser to Safari, as due to its QuickTime Player integration, disables you from recording Netflix on Safari. In order to avoid recording unwanted screens or being limited to what you can record, you should unplug any external monitor that’s connected to your Mac, as yet again might prevent you from being able to record.
Step 8:
Login to your Netflix account and choose the show or film you wish to record. Hit the ‘Record’ icon on Apowersoft and select ‘Full screen’ or ‘Region’, depending on what suits you best.

Step 9:
Once you’ve finished recording, minimise your Netflix tab and find the Apowersoft logo at the top-right-hand corner of your Mac, in order to ‘Stop recording’. When you stop recording, you should be presented with a .MOV file.
Step 10:
After you’ve finished recording, you’ll be able to see the file in your Apowersoft main tab, where it will show you by default the file’s name, size, duration, and creation date. The .MOV file can now be watched offline on your Mac, meaning you can finally watch your Netflix show without the need to be connected to the internet.
Apowersoft provides an in-built .MOV to MP4 converter, which comes in handy when transferring that Video to iPhone or iPad. In order to use it, simply hit the ‘Convert’ icon on the recorder and you’ll be presented with another window.
That was our simple guide to let you save Netflix content on iOS devices. If you’ve any queries please drop a comment.
