
Finally after a long time, Samsung released official 5.1.1 lollipop update for Galaxy Note 10.1 2014 edition and today you will learn How to Update Galaxy Note 10.1 P600 (2014) to 5.1.1 Lollipop Official. Galaxy Note 10.1 2014 was released 2013, September. It is a successor to the well-known Galaxy Note N8000 which made its position in the top Android Tablets of 2012. Galaxy Note 10.1 2014 edition was released with 4.3 jellybean and the latest update 5.1.1 lollipop for this device releases now, in 2015. It is absolute that all of the users didn’t get this update over the air (OTA) on their device. So, those who didn’t get this update on their device can get Lollipop on Galaxy Note 10.1 2014 by following this guide.
The new update for Galaxy Note 10.1 P600 came with a bunch of new features. You will feel a great difference in this update. The status bar is changed, lock screen is new and improved, settings menu is changed, performance is boosted in the new lollipop firmware, battery performance is also increased and many new improvements have been made in the new 5.1.1 Lollipop update. The overall user interface is revolutionize to give the user a whole new experience. So, this update has brought a lot of new features and change which really took up the Galaxy Note 10.1 2014 to the whole new level.
Anyways lets get ready to know How to Update Galaxy Note 10.1 P600 (2014) to 5.1.1 Lollipop Official. Follow the steps below carefully and real all the instructions and disclaimer.
Updating the Galaxy Note 10.1 P600 (2014) to Lollipop
The official 5.1.1 lollipop update is released on October, 2015. It arrived on some of the devices through OTA but all the users didn’t get this update. So, those who didn’t get this update on their Note 10.1 can install this update manually by following all the instructions given below. I will make this process as easy as possible so, all can understand it well. The guide for How to Update Galaxy Note 10.1 P600 (2014) to 5.1.1 Lollipop Official is given below. Read carefully.

New Changes and Features in the Lollipop Update
- New Lockscreen.
- Changed and improved Status Bar.
- Settings menu changed slightly.
- Better Battery Performance.
- Improved app response.
- Smooth performance overall.
- Animations improved.
- And many more,,,,,
Disclaimer
- The method below is only for Galaxy Note 10.1 model no SM-P600. Do not try this on any other model. If you are completely unaware of this process then you should not do this. Try this only at your own risk. If something wrong happens with your device during the process then Droidopinions.com will not be held responsible. The firmware here is official so you can install this on any unlocked Galaxy Note 10.1 P600 in any country. You will not loose your warranty. The root access will vanish after the update, Thanks
Firmware Details
Device: Galaxy Note 10.1 WiFi 2014 Edition
Model No: SM-P600
Country: Spain (PHE)
Version: 5.1.1 Lollipop
Build Date: 23 October, 2015
PDA: P600XXUDOJ3
CSC: P600OXADOJ3
Materials Required
- Galaxy Note 10.1 P600 (2014 Edition)
- A PC or a Laptop
- USB Data Cable
Necessary Instructions Before Proceeding
- First confirm the model of your device by going to Settings>>About Phone>>Model No. Make sure that it is SM-P600 then proceed.
- Backup all the important data like contacts, sms, pictures and videos etc so may not lose them if something goes wrong while update process.
- Install Samsung USB Drivers on your PC.
- Charge your tab to above 55% to avoid the battery drain issue.
- Always use the perfectly working USB Data Cable.
Downloads Required
5.1.1 Lollipop Firmware SM-P600
Note: You will need to make an account on sammobile for downloading the firmware.
How to Update Galaxy Note 10.1 P600 (2014) to 5.1.1 Lollipop Official, Steps
Step-1
- Download the lollipop firmware from the links above and extract it on your computer to get a file with tar.md5 extension.
- Download Odin v3.09 and extract it.
Step-2
- Enable the USB Debugging Mode on your device by going to Settings>>Developer Options. If Developer Options are not present then you need to activate them, you can do this by going to Settings>>About Phone and tap on Build No seven times. This will activate Developer Options on your phone.
Step-3
- Now turn off your Galaxy Note 10.1 P600.
Step-4
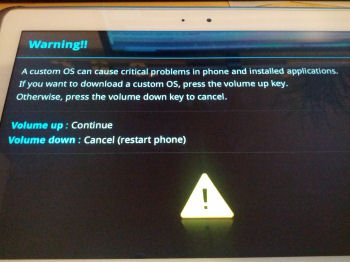
- While your tabled turned off enter into Download Mode by pressing and holding Home+Volume Down+Power button for a few seconds until a warning screen appears. Now press the Volume Up button to confirm.
Step-5
- Now launch Odin on your computer
Step-6
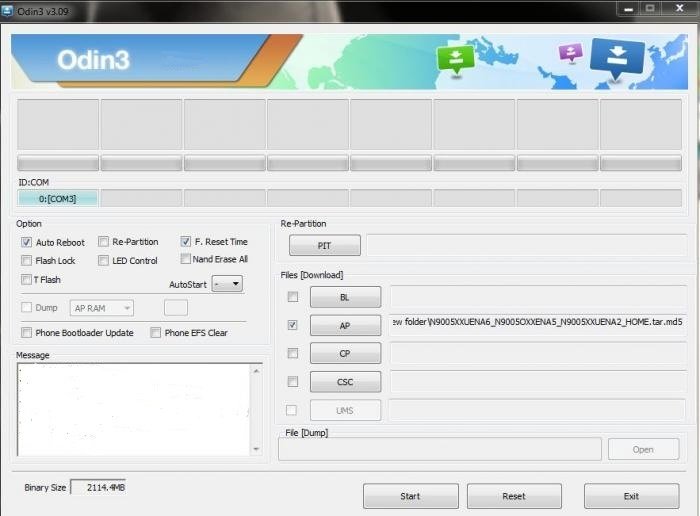
- Connect your Galaxy Note 10.1 P600 to the computer via USB Data Cable. The ID:COM box in Odin will turn blue, this means that your device is connected successfully.
Step-7
- Now in Odin select on the AP or PDA option and select the extracted lollipop firmware downloaded in the first step which is in tar.md5 extension.
Step-8
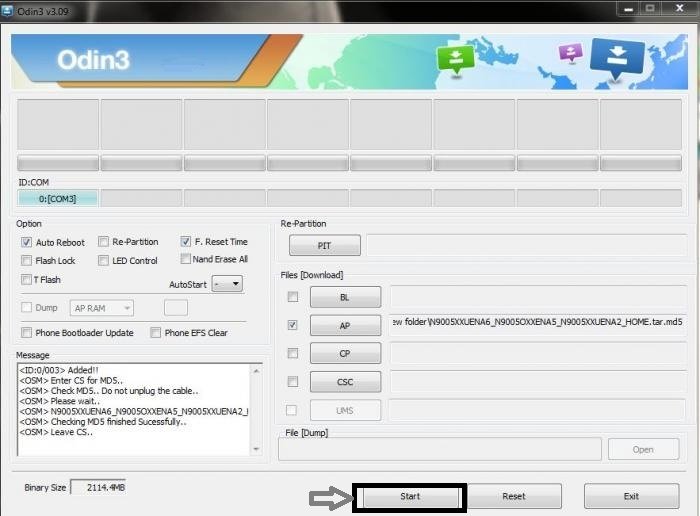
- Ensure that only Auto Reboot and F.Reset Time options are checked in Odin.
Step-9
- Review the whole process again for any faults and errors. Now click on the Start button to begin the Process.
Step-10
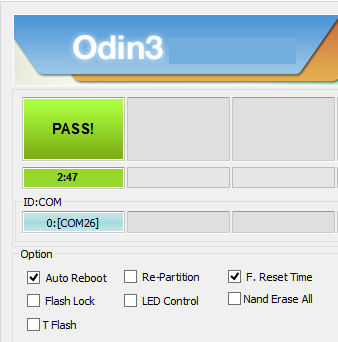
- After clicking on start button Odin will start flashing the firmware on your device. Wait for some time to complete the process. When the process completes Odin will Show Pass message on the screen and your device will automatically reboot.
Step-11
- Your device will restart automatically after the completion of the process. At first it would take some time to show up the screen. Disconnect the cable when you see the home screen.
Note: If Odin gets stuck during the process then disconnect the cable and repeat the process again.
Congratulations !!! by doing all the above process you have just updated your Galaxy Note 10.1 2014 Edition to the latest Android Version 5.1.1 Lollipop. Now your device is refreshed once again. If you have any problem then comment.
How to Fix if you are Stuck at Samsung Logo
It is common that most of the times when you update your Android device with the new firmware it gets stuck at the logo or bootloop. This problem can be solved by performing the data factory reset through the recovery mode. In order to solve this issue follow the instructions below.
- Switch off the device if possible or you can also do this while on bootloop screen.
- Press and hold the Home+Volume Up+Power button for a few seconds then release until the recovery menu appears.
- In the recovery menu scroll down to Wipe Data/Factory Reset with the help of Volume button.
- Now select and confirm the task with the help of power button.

By doing the above process your all user data will delete and your device will set to original factory settings. Now select the Reboot system now option to restart the device. Wait for sometime your device will probably show the home screen now.
So that was it guys, hope you like it and got all the information you needed.
Please like, share and subscribe. Comment to share your views with us.
About step 4..
Press power + vol down is enough. No need for pressing home key simultaneously.
BTW, your article is good! b^_^
Thank You so much for this step by step process. I just upgraded my p600 and it worked great….