Here’s how to sideload Kodi on iOS 10 and yes, you don’t need jailbreaking. For those unaware, Kodi was originally known as XBMC, is a very popular open source media center that is loved, and preferred by a large number of people. Kodi offers plethora of plugins, and customisation options. In this thread you’ll learn to sideload Kodi on iOS 10 using Xcode.
Sideloading apps using Xcode is not the most user-friendly of solutions, but still cool, as it allows for excellent apps like Kodi to be installed onto a device without a jailbreak being required. Kodi is available for iOS but, it’s not officially available on the Apple App Store. Which means you need a Jailbroken iOS device but there is another way to get it done without jailbreaking.
What you need?
A Mac running the latest version of macOS.
Newer version of Xcode or Xcode 7. Xcode is Apple’s own development environment and is available to download for free from the Mac App Store.
An active Apple Developer account. To create free developer account (free account will require re-sideloading every 7 days), Go here
iOS App Signer utility Here
Kodi deb files from Here
Sideload Kodi on your iOS 10, No Jailbreak required
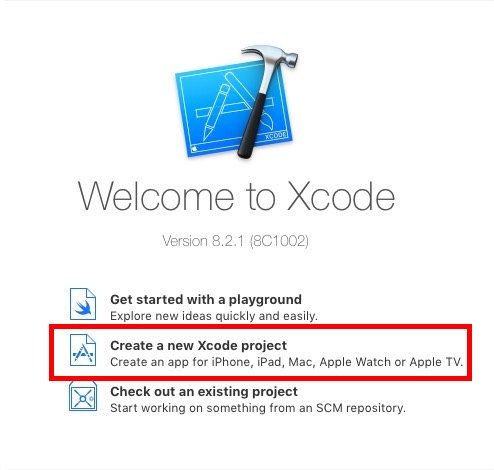
1. Launch Xcode on your Mac and Create a new Xcode project.
2. When you see the main Xcode interface, select ‘iOS’. Then, select Single View Application from the main interface and select Next.

3. Give your application a Product Name and type in a unique name for this new application. You’ll also need to provide an Organization Identifier, which is generally a reverse domain entry that is inherited from the name of the application. As an example, we can use com.rp.[App Name]. Then, click on Next.
4. Select a location to save the project , and click on Create.
5. Xcode will now complain about the provisioning profile. You don’t really need to understand the complexities about these profiles so just click hit the Fix Issue button.
6. Connect your iPhone or iPad to your Mac using a USB cable, and select it from the list of devices shown at the top, in Xcode.
7. Next, launch the iOS App Signer you downloaded. In the app, click the Browse button select the Kodi deb file that you downloaded earlier.
8. Once the deb file is selected, select the Signing Certificate and Provisioning Profile from dropdown menus.
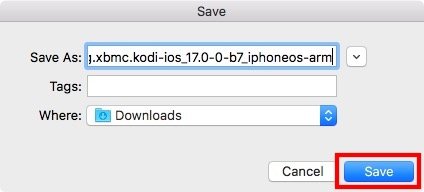
9. Hit the Start button from the iOS App Signer app once the above information has been selected and highlighted. You will be asked for a location to save the output file , as. Choose wherever you want the file to be saved, and click on “Save “. iOS App Signer will then work through a couple of steps.

10. Go back into Xcode and click on “ Window” in the menu bar, and click on Devices and then click the “+” button.
11. Locate and Select the IPA file that iOS App Signer will have exported. Xcode will now show as busy for a period of time while installing/sideloading the Kodi IPA to the connected device. Once done, it will show Kodi in the list of installed devices, and you will also be able to see it on the home screen of your iPhone.

That’s it, when launching Kodi on your iOS device, you will have to trust the certificate in your iPhone. Go to Settings > General > Device Management > Developer App and then tap on Trust. Enjoy Kodi on your Non-jailbroken Device.
Hope you enjoyed it guys. Follow us on twitter, Facebook, Google+. Drop your views in comments below and please subscribe to our blog. Bye, Take Care.
