
Galaxy Tab 3 10.1 is a Samsung’s Android Tablet released in June, 2013 and today I’m gonna show how you can Root Galaxy Tab 3 P5210 on any firmware whether it is Jelly bean or Kitkat. We will root Galaxy Tab 3 with the Chain Fire’s auto root file. Odin will be used for flashing the root file on Galaxy Tab 3. You can do this process on any stock firmware running on your tablet. It can be done on Jellybean and Kitkat.
Process is same for both jelly bean and kitkat and the same CF-Auto Root file will be used. So, guys be ready to root the Samsung Galaxy TAB 3 P5210 easily on any stock firmware.

Rooting The Galaxy Tab 3 10.1 P5210
The tutorial to root the Samsung Galaxy Tab 3 10.1 is defined below. First let me tell you a little about, What is Root?. Rooting is the process to gain the full authority over the phone’s whole operating system and its sub system or we can say that rooting the phone removes all the system restrictions that were governed by the software. By rooting your device you can manage the all the app permissions yourself. You will get the full freedom over your phone and you can install the third party apps, custom roms and recoveries etc. So, you can dive deep into the system by gaining the root access. For an Android Geek, root is the first necessary step to proceed his journey and test the limits of his device.
So, lets us proceed to the procedure to root Galaxy Tab 3 P5210 running any stock Jellybean or Kitkat firmware. Before proceeding read the instructions and disclaimer.
Also See: Update Galaxy Tab 3 10.1 P5210 to 4.4.2 Kitkat Official
Disclaimer
- The following method is only for Galaxy TAB 3 10.1 model no GT-P5210. Do not try this on any other model. The process only for advance user who has the knowledge about this kind of process. If something wrong happens with your device during or after the process then droidopinions.com will not be held responsible. You will lose your device warranty after rooting, Thanks.
Necessary Instructions Before Proceeding
- Check the model no of your device by going to Settings>>About Phone>>Mode No. Make sure it is P5210 then proceed.
- Backup your important data like contacts messages, pictures, videos etc to avoid losing data in case of any mishap.
- Your phone should be charged above 60% just to avoid power failure issues.
- Your PC should have Samsung USB drivers installed.
Materials Required
- Galaxy Tab 3 10.1 P5210
- A PC or a Laptop
- USB Data Cable
Download Required Files
CF Auto Root File for Galaxy Tab 3 P5210
Root Galaxy Tab 3 10.1 P5210, Steps
Follow the steps below to root your Galaxy Tab 3 10.1 P5210 on any stock firmware.
Step-1
- Download the Cf-Auto root file on your PC and extract it. You will get a file with tar.md5 extension after extraction.
- Now download Odin v3.09 and extract it too.
Step-2
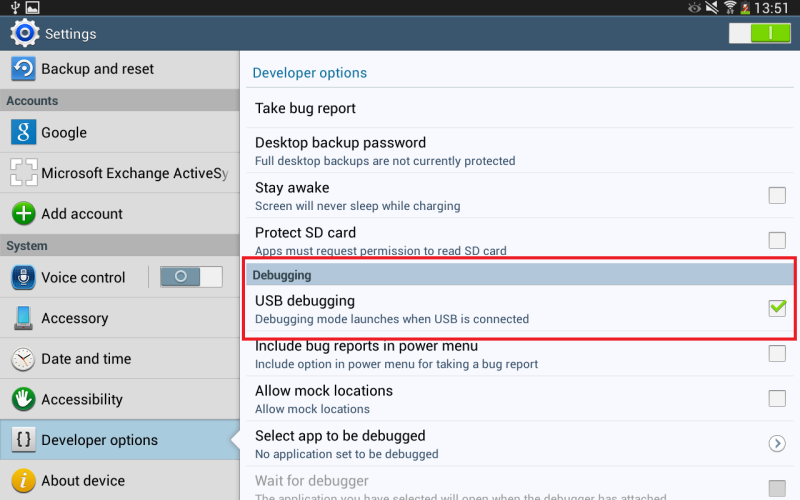
- On your device go to the Settings>>About Phone, scroll down to the Build No and tap on it seven times. This will activate developer options on your device.
- Now go back and open the developer options, scroll down and enable the USB Debugging Mode.
Step-3
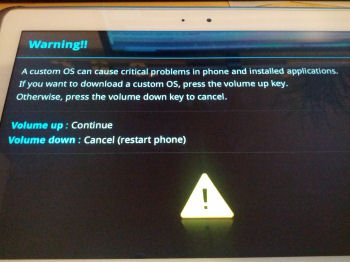
- After that turn off your Galaxy Tab 3.
- Enter into download mode by pressing and holding Home+Volume Down+Power button until a warning screen appears. Now press the Volume Up button to confirm the task.
Step-4
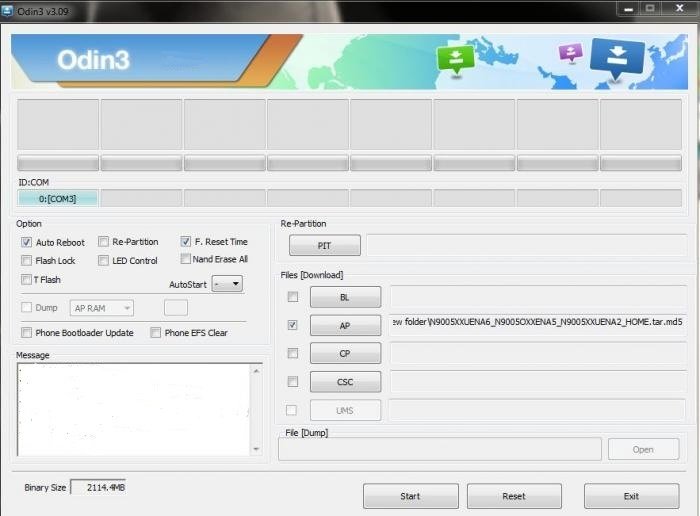
- Now launch Odin on your computer.
Step-5
- Connect your Galaxy Tab 3 to the computer. Odin will detect your device and ID:COM box in Odin will turn blue.
Step-6
- After that click on the AP button in Odin and choose the extracted CF-Auto Root file which is in tar.md5 format.
Step-7
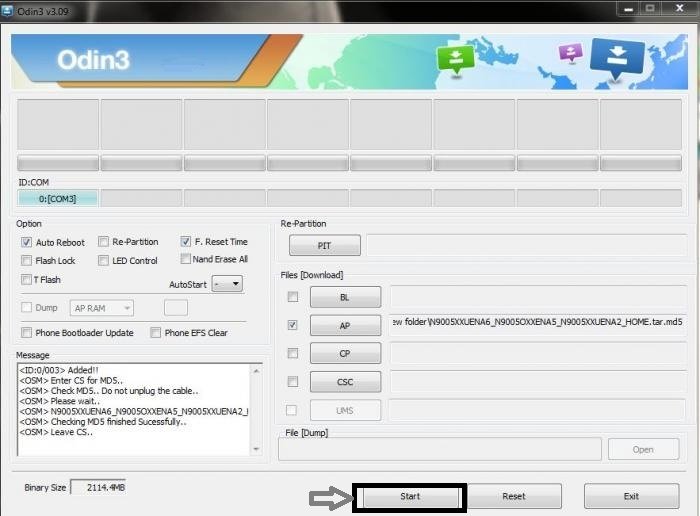
- After selecting the file click on the Start button to begin the process.
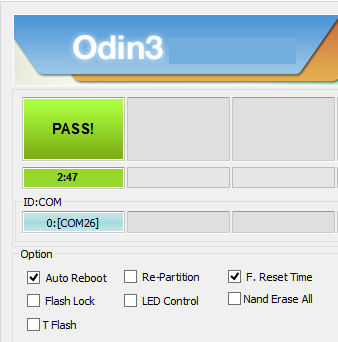
Step-8
- Odin will now start flashing the root file on your Galaxy TAB 3 P5210. Wait for some time till the process completes. When the process completes Odin will show the PASS message on the Screen. Your device will automatically reboot now.
Step-9
- Disconnect the cable when your device restarts and wait till your device shows up the home screen. And All Done !!!
Note: If Odin Stucks at any point then unplug the cable, reconnect again and repeat the process.
So guys you have rooted your table successfully by following the above instructions. Hope you like our tutorial to root Galaxy Tab 3 P5210. If you have any questions then ask in the comments section below for the answers.
Note that if your device is not showing home screen and stopped at Boot screen then you can solve this problem by following (these instructions).
Verify Root Access on your Device
If you want to verify the root access on your device then you can find the Super SU app in your apps drawer or you can install an app called root checker from Google Play Store. Root checker will verify the root access on your phone that whether it is rooted or not.


So that was it. Hope you like our tutorial. Now time to Go, Bye!!
Please like, share and subscribe. Comment also to share your views. Follow us on twitter, facebook, GooglePlus.