The latest official Android 9.0 pie firmware is released for Galaxy Note 9. With new firmware any previous root and custom recovery, if any, will be gone. So to Install TWRP recovery on Galaxy Note 9 running 9.0 Pie latest firmware, you can follow the instructions given in this article.
The process is pretty simple if you follow the instructions carefully. First you need to install TWRP Custom recovery on Galaxy Note 9 running Android 9.0 pie firwmare. Then using that custom recovery you can install Magisk to Root Galaxy Note 9 on Android 9.0 pie.
Update Galaxy S9/S9 Plus to 9.0 Pie in Any country.

Compatible Note 9 Models for This Method
This method to root Galaxy Note 9 is compatible with follwing models. Go to Settings>>About Phone and check that the model no is matched with the below listed models.
- Galaxy Note 9 SM-N960F
- Galaxy Note 9 SM-N960FD
- Galaxy Note 9 SM-N960N
- Galaxy Note 9 SM-N960X
Disclaimer
Rooting the phone is an unofficial process and void your phone’s warranty. So, proceed at your own risk. Incase of anything wrong happens with your phone then Droidopinions will not be responsible.
Download These Things
Download the below required things.
Install TWRP Custom Recovery on Galaxy Note 9
The first step is to install TWRP Custom recovery on Galaxy Note 9. Follow these steps to install twrp recovery.
- Download twrp recovery from above links on PC.
- Now Download oding from above links on your PC.
- On your phone. Go to Settings>>About Phone>>Build Number. Tap on it seven times to activate developer options.
- Now go to Developer Options and enable OEM Unlock. Also enable USB Debugging.
- Now turn off your phone.
- And press an hold, Volume Down+Bixby+Power buttons together until a warning screen appears.
- Press the volume up button to confirm it, you will now be into Download Mode.
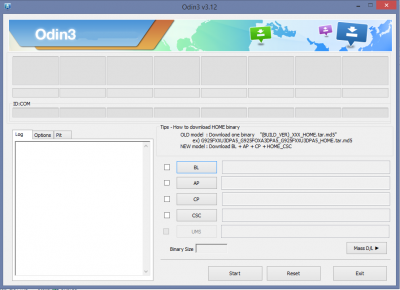
- Launch Odin on your PC and connect your phone. An added message will appear in Odin. If not then reconnect the cable or try installing samsung usb Drivers.
- In Odin click on AP/BL option and select the TWRP recovery file.

- In Odin in the options tab, uncheck Auto Reboot options and make sure only F.Reset time option is checked.
- Now, recheck everything. And finally hit the Start button to begin installation of the TWRP on Galaxy Note 9.
- When installation completes. Disconnect the phone.
- Hold Power button for few seconds. When the screen turns black, again quickly hold Volume Up+Bixby+Power buttons.
- Your Galaxy Note 9 will now bootup into TWRP recovery mode. release all the buttons when it does.
- You are now in TWRP recovery menu, here you will be asked to modify he system, you can decline this.
- From this point, you can normally reboot your phone to use it because you have now installed TWRP Custom Recovery on Galaxy Note 9.
This is it. If you have gotten into any problem while installing TWRP Custom recovery on Galaxy Note 9 Android 9.0 pie firmware. Drop your comments below.
